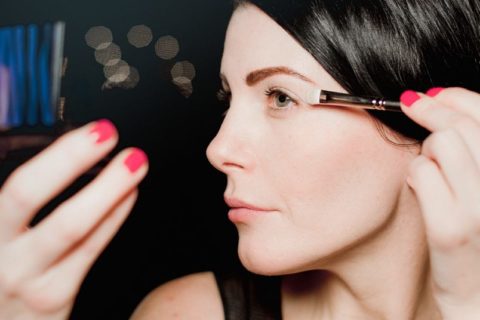
As the old saying goes, tis’ the season to be jolly, and with that comes the endless lineup of holiday parties and family get-togethers that call on you to look your best. To keep your beauty look fresh and on point this party season we’re bringing out the big guns and demonstrating the graphic eyeliner trend that continues to be a favourite among designers and beauty editors around the world.
Take note of this graphic eyeliner step-by-step that was designed with all eye types in mind to minimize complexity and keep your look fresh and attention-grabbing this holiday season. To complement this bold look, gravitate towards a lighter lip by using a rose or nude gloss as to not over power the graphic liner, which will steal the show on its own.
holiday-tutorial-graphic-eyeliner-2
Step 1:
It’s important to prep the lid with an eye shadow base prior to applying your liner – this will provide a dry canvas for long lasting wear as well as add greater depth to the overall look.
Choose a neutral tone that compliments your skin tone and try to keep the shadow as matte as possible so it does not over power the graphic liner and simply highlights the eye area.
Begin by lightly brushing along the lower lid and move upward towards the brow bone until your eyelid is covered. This will create a solid base and add depth.
holiday-tutorial-graphic-eyeliner-3
Step 2:
Stepping away from conventional liquid liners, try a gel based potted liner that is designed for long lasting wear. In order to maintain control and provide a seamless application gravitate towards an angled brush that is not too thick, this will help with an effortless and steady application.
Start by placing the liner at the inner corner of your eye and follow your lash line to the outer corner. Stop applying product when you hit the end of the outer corner of your lash line.
holiday-tutorial-graphic-eyeliner-4
Step 3:
Now it’s time to build your graphic liner structure.
Apply more gel liner to your angled brush and paint a line moving outwards above the upper lash line. Continue this movement until your brush reaches just above your crease line and stop.
holiday-makeup-tutorial-graphic-eyeliner-4
Step 4:
Switch the angle of your brush to point inwards and begin to apply liner above the crease line about an inch to complete the graphic look.
Depending on the level of drama you wish to capture, you can continue moving towards the inner eye until you have found an end point that suits your needs.
Finish off the look with a couple of coats of your favourite mascara.
holiday-tutorial-graphic-eyeliner-1
Products used: QUO Eye Shadow Palette Urban Legend, Maybelline 24 Hrs Color Tattoo Leather Black, M.A.C 266 Angled Brush
The post Holiday makeup tutorial: Master a dramatic graphic eyeliner look in time for this year’s festivities appeared first on FASHION Magazine.
Use left/right arrows to navigate the slideshow or swipe left/right if using a mobile device


